§ How-To
Trimmer Head Keeps Falling Off? Here's What's Wrong
A loose or cross-threaded trimmer head is frustrating and dangerous. Diagnose the cause and fix it for good.
If your trimmer head keeps falling off, you are definitely not the only one dealing with it. This is one of those issues that comes up often in online communities and owner forums, especially after a spool change, bump knob replacement, or routine restringing. The frustrating part is that the head may seem like it should simply thread back on, yet it loosens, drops off, or refuses to stay assembled.
In most cases, the problem is not random. A trimmer head usually falls off for a specific mechanical reason: damaged threads, missing retaining hardware, incorrect assembly order, a worn bump knob, or turning the head the wrong direction during installation. Once you understand why it is happening, the fix is usually straightforward.
Why the trimmer head keeps falling off
A string trimmer head is constantly exposed to vibration, impacts, heat, dirt, and repeated disassembly. That means small assembly mistakes or worn parts show up quickly.
Here are the most common root causes:
1. The head was threaded on in the wrong direction
Many trimmer heads use reverse threads, also called left-hand threads. That means they tighten in the opposite direction from a standard bolt. Owners often reinstall the head the “normal” way, which feels right at first, but vibration quickly loosens it and the head falls off.
This is one of the most common reasons this question comes up in owner forums.
2. The spindle threads or head threads are stripped
If the trimmer head has been cross-threaded, overtightened, or repeatedly installed incorrectly, the internal threads in the head or the threads on the drive shaft can wear down. Once that happens, the head may start on the shaft but will not stay secure under use.
A stripped head can sometimes feel snug by hand, then pop loose as soon as the machine reaches speed.
3. A retaining cap, bump knob, spring, or arbor piece is missing
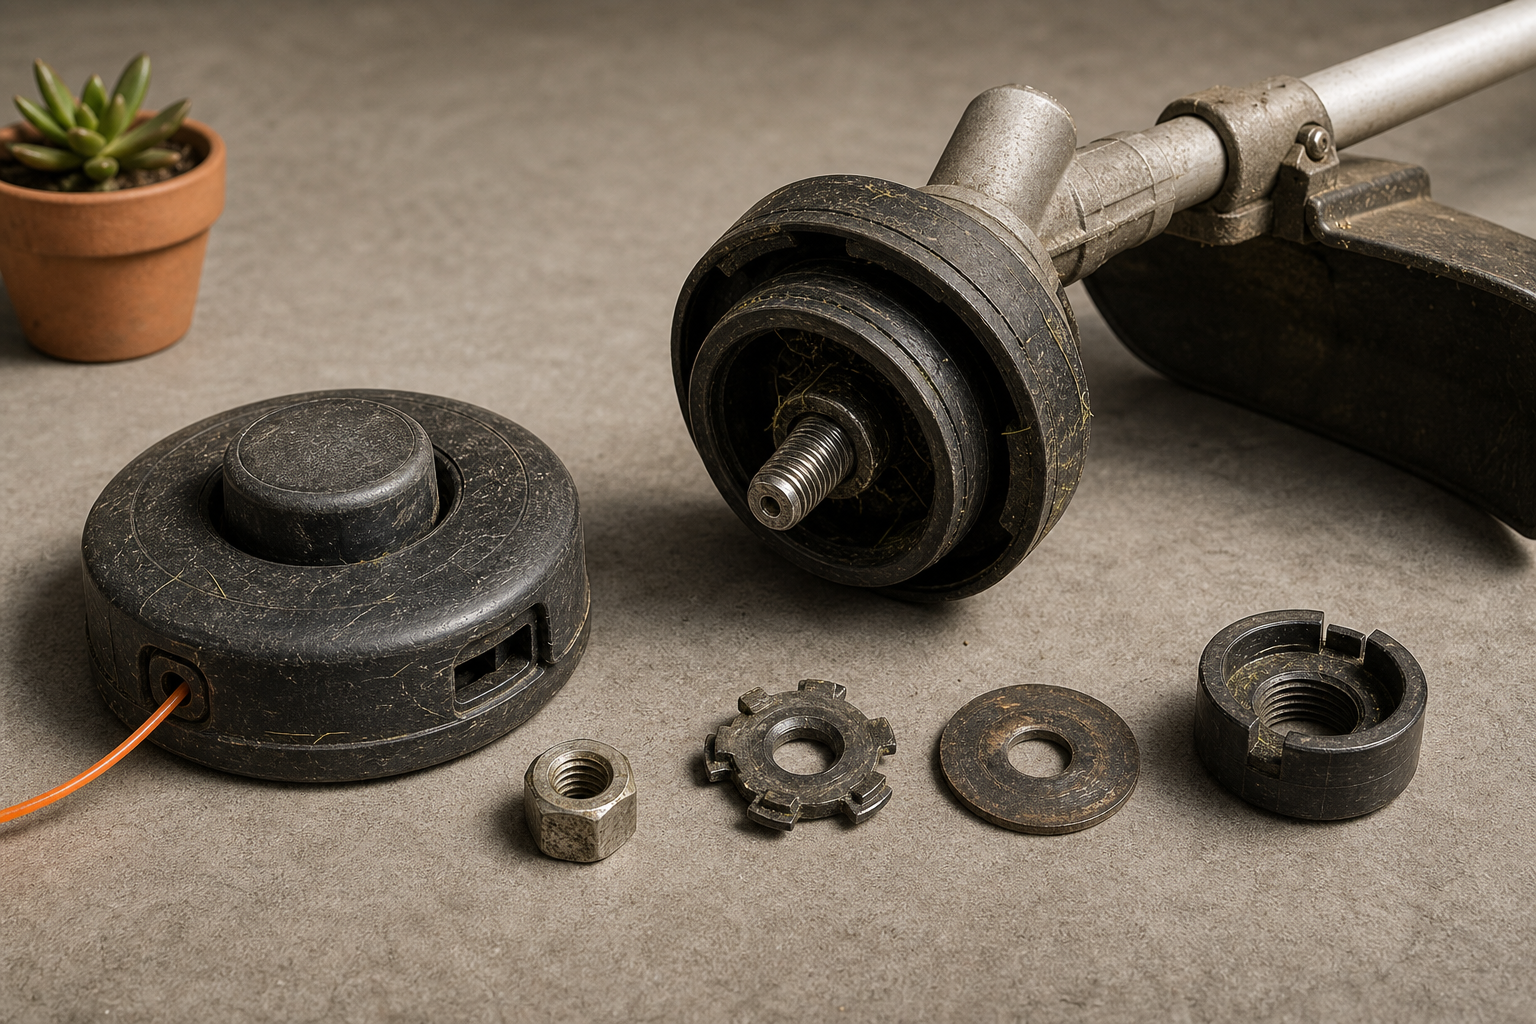
Some trimmer heads rely on more than one part to stay together properly. Depending on the design, the spool, spring, cap, bump knob, and housing all need to be installed in the right order. If one piece is missing or cracked, the assembly may come apart and make it seem like the entire head is falling off.
This is especially common after someone takes the head apart for restringing and one small piece is left out.
4. The bump knob or spool housing is worn or cracked
The bump-feed head takes repeated impacts against the ground. Over time, the bump knob can wear down, the locking tabs can weaken, or the spool housing can crack. When that happens, the head may not lock together correctly, even if the shaft threads are fine.
If the plastic tabs are rounded off or broken, no amount of tightening will make the head reliable again.
5. Debris or damage is preventing full seating
Grass, string fragments, dirt, and melted nylon can build up around the head and arbor. If the head cannot fully seat against the drive surface, it may seem installed but never actually clamp down as intended. Vibration then works it loose.
How to diagnose the real problem
Before ordering parts or forcing anything, take a few minutes to inspect the assembly. A careful diagnosis usually tells you whether you need a simple reinstall or a full head replacement.
Check whether the head uses reverse threads
Look in your owner’s manual if you have it. If not, inspect the shaft and head carefully. Many trimmer heads tighten opposite of what you expect. If you have been turning it the standard clockwise direction to tighten, that may be the entire issue.
A good clue is whether the head gets looser when the trimmer spins in use. Manufacturers often use reverse threads specifically so rotation keeps the head tight.
Inspect the shaft threads
Remove the head and look closely at the spindle or arbor threads. Healthy threads should be clean, even, and clearly defined. Warning signs include:
- Flattened thread peaks
- Metal shavings
- Cross-thread marks
- Sections that look polished or chewed up
If the shaft threads are damaged, a new head alone may not solve it.
Inspect the head’s internal threads and housing
Look inside the trimmer head where it threads onto the shaft. If the plastic or metal insert is stripped, cracked, or egg-shaped, the head is done. Also inspect the outer housing for cracks near locking tabs, cap grooves, and the bump-feed area.
Confirm all internal parts are present
If the head itself is coming apart, disassemble it and verify you have every component:
- Spool
- Spring
- Bump knob
- Retaining cap
- Eyelets or line guides
- Washers or arbor adapters, if your model uses them
A missing spring or worn cap can make the spool pop out or keep the head from locking together.
Clean the mounting area
Wipe away packed grass, dirt, and melted line residue from the shaft and head. A dirty mounting surface can keep the head from seating fully.
The fix: how to keep the trimmer head on for good
Once you know what failed, the repair becomes much easier.
If it was installed in the wrong direction
Remove the head, align it carefully, and reinstall it using the correct thread direction. Start slowly by hand to avoid cross-threading. If it does not spin on smoothly, back it off and try again. Never force it.
Lock the shaft if your unit has a shaft-lock hole or spindle-lock feature, then tighten the head firmly by hand or as specified by the manufacturer.
If the threads are dirty but not damaged
Clean both sets of threads with a brush and rag. Remove all debris before reinstalling. If the threads are intact, the head should seat properly once clean.
If the head housing, cap, or bump knob is worn
Replace the worn component or the complete trimmer head assembly. In many cases, replacing the full head is the most reliable choice because multiple worn pieces often fail together. If the spool cap tabs are weak or the bump knob is badly worn, the problem usually returns unless those parts are renewed.
Compatible replacement parts are available on this site, including complete trimmer heads, bump knobs, spools, caps, and other fitment-specific components for many popular models.
If the internal parts were assembled incorrectly
Rebuild the head in the proper order. Make sure the spring is seated correctly, the spool is oriented properly, and the cap or knob snaps or threads into place fully. Misassembly is especially common after restringing.
If your model uses an arbor adapter or washer, do not leave it out. That small part often centers the head and keeps it secure.
If the shaft threads are stripped
This is the point where you need to stop forcing the head on. If the spindle itself is damaged, the permanent fix may involve replacing the arbor, gearbox output shaft, or lower drive assembly depending on the trimmer design. A new head will not stay attached to bad shaft threads.
Watch: Video walkthrough
If you want to see the head replacement process step by step, this walkthrough is helpful:
Watching the sequence can make a big difference, especially if you are dealing with a head that seems stuck, won’t go back together, or keeps loosening after restringing.
How to prevent it from happening again
A trimmer head usually does not “just fall off” without warning. A few maintenance habits will help you avoid repeat failures.
Start all threads by hand
Never use power tools to start a trimmer head. Hand-thread it first so you can feel whether it is aligned correctly.
Do not overtighten
Too much force can damage plastic housings and thread inserts. Snug and properly seated is better than forced.
Inspect the bump knob and cap regularly
If the locking tabs are wearing down or the cap is cracking, replace it before it fails during use.
Clean after heavy trimming
Packed debris accelerates wear and can affect how the head seats. A quick cleaning after each job goes a long way.
Replace worn line properly
Using line that is too thick, too stiff, or incorrectly wound can jam the spool and stress the head assembly. Always use the correct size and wind it evenly.
Replace small hardware when needed
If your model uses washers, spacers, springs, or adapters, keep them with the trimmer during service. Small missing parts cause a lot of big headaches.
FAQ
Why does my trimmer head loosen every time I use it?
The most likely causes are reverse-thread confusion, damaged threads, or the head not fully seating because of debris or a missing part.
Can I just glue or lock the trimmer head on?
No. Adhesives and permanent thread lockers are not a proper fix. The head needs to be serviceable, and those products can create bigger repair problems or make future spool service difficult.
Should I replace the whole head or just one part?
If only the cap, bump knob, or spool is worn, replacing that individual part may be enough. But if the housing is cracked, the tabs are worn, or several pieces are loose, a complete compatible head assembly is usually the better long-term repair.
Find the right part on Amazon
Check price, stock and fitment — ships direct from Amazon.
§ Catalog
Shop the catalog